Steps to Safely Eliminate Mold in Your Home

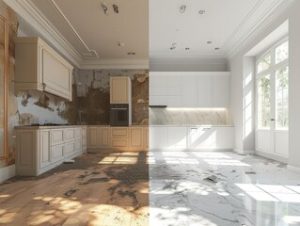
Mold Remediation Provo is a process that reduces the amount of mold in your home or building. It involves containing the mold, cleaning and removing affected materials and air filtration to keep the mold at bay.

Mold Removal

Remediators isolate contaminated areas with a plastic containment to prevent spores from spreading to other parts of the property. They also use negative air machines with HEPA filters to clean the air and trap airborne spores and other debris.

Mold remediation involves a number of different procedures, including inspection, testing, removal, demolition, sanitizing and containment. The process is highly regulated, and requires professional judgment to determine the best method for each situation. The type of material present and the size of the affected area determines what methods are used. Porous materials such as drywall and carpet require removal, while non-porous materials like metals and plastics can usually be cleaned and saved. Personal belongings require special attention, as they may not only be structurally compromised by the presence of mold but also have significant sentimental value.

In most cases, a professional restoration company will take items that can be saved and clean them offsite. This will allow the restoration company to use specialized cleaning methods to get your personal belongings back in pristine condition.

As part of the remediation process, all contaminated building materials must be removed, including drywall, carpeting, and insulation. This is a lengthy process that can be extremely expensive. In some cases, the damaged materials need to be replaced entirely. It’s important to find a company that has certifications from reputable organizations, a track record of experience and good customer reviews.

Remediation techniques must be carefully selected to prevent spores from becoming airborne, as this can cause respiratory issues for both occupants and remediators. Remediators should use PPE such as masks and gloves and follow stringent containment strategies. For example, sanding or wire brushing porous materials such as wallboard can stir up spores. Additionally, invasive actions such as stripping or peeling wallpaper can release large amounts of spores into the surrounding air.

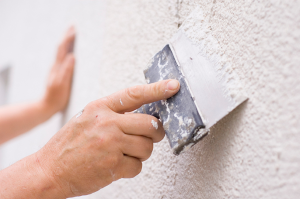
Once the contaminated materials are removed, the space must be thoroughly cleaned and sanitized. Remediators will use a variety of cleaning solutions, including detergent solutions, to remove remaining mold growth. The space will then be wiped down and dried with fans, to ensure that all moisture is gone.

During this step, all windows and doors are closed between the affected area and other rooms of the house. Plastic sheeting is often used, and the area is sealed with duct tape to keep spores from entering other parts of the home. A HEPA vacuum cleaner is often used to ensure that all spores are killed and unable to return to the affected area.

Safety Precautions

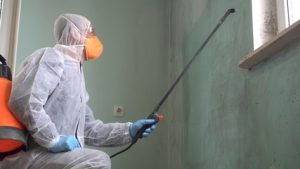
When working with mold, there are many safety precautions that must be taken to ensure the health and well-being of building occupants. These measures include full containment, use of personal protective equipment, and following recommended cleaning and removal steps to minimize dust dispersal. The minimum level of PPE for this work is a filter face mask, disposable gloves, and eye protection.

Remediators must also protect themselves from spores by covering their skin with long-sleeved shirts, pants, and waterproof boots or shoes. These materials prevent mold spores from clinging to their clothes and then spreading throughout the building. In addition, the use of an air scrubber or HEPA vacuum helps to filter out these spores and reduce their spread.

The contaminated materials that are removed should be placed in impermeable plastic bags for disposal. It is important not to disturb the mold spores that are trapped in these materials, as they could potentially re-infest the building. This is why it is recommended that professionals use a decontamination room before and after entering the contaminated area.

Building staff must also avoid eating, drinking, or using cosmetics and tobacco products in areas where mold remediation is taking place. This prevents contamination of these items with mycotoxins, which can cause allergic and inflammatory reactions in some individuals.

It is also a good idea to avoid direct contact with moldy surfaces, as this can lead to dermatitis in sensitive individuals. Lastly, building occupants should not enter the moldy area unless they have been vaccinated against mycotoxins.

Once the mold is cleaned and the source of moisture has been identified and corrected, it is crucial to verify that the area is safe for reoccupation. This can be accomplished through visual inspections and air quality testing.

When choosing a professional mold remediation service, make sure to choose one with experience and a nationwide presence. Companies such as ServPro and Paul Davis are known for their thorough approach and comprehensive services, making them a great choice when dealing with a mold infestation. They can identify and address the root of the problem, such as hidden leaks, to prevent recurrence.

Materials

Mold remediation professionals use a variety of materials in the removal, cleaning and restoration process. These include rags, sponges, plastic sheeting and fans. In addition, special chemicals are used to kill mold and disinfect surfaces. Bleach-based chemicals that contain chlorine, for example, are effective mold killers. However, because they are oxidizers (they react with organic material), they break down quickly when they come into contact with it. They also can be harmful to living tissue, so they must be used with great care. Bleach-based chemicals are a good choice when the presence of organic material is suspected, such as on porous building materials like drywall or carpeting. Other chemicals that are used in mold remediation are antimicrobials, such as quats or phenols, which can be very effective against both fungus and microorganisms. These chemicals are also relatively inexpensive and noncorrosive.

Remediation workers should also wear protective clothing during the remediation process. Disposable paper overalls are recommended for small projects and full body suits are necessary for large or complex remediation jobs. Remediators should also wear a mask when working with bleach-based chemicals, since these can irritate the skin and nose. A respirator with a high-efficiency particulate air filter is also essential for reducing the number of airborne spores during a remediation project.

The first step in any mold remediation process is identifying and fixing the source of moisture that is fueling the growth. Once this is done, building materials that have been affected by mold can be cleaned and dried. The remediation company may use dehumidifiers, fans and other methods to speed up the drying process.

Once all building materials have been treated and dried, a detailed inspection and cleaning of the area is conducted. Then, the mold spores that were not removed during the cleaning process are collected by a HEPA vacuum cleaner and are placed in sealed containers for disposal.

While mold removal companies can be successful by simply removing the visible signs of mold, they are often unable to fix the underlying issues that cause it to return. Unless these are addressed, the mold will grow back, and the customers will likely complain. Mold remediation, on the other hand, is a much more detailed and reliable process that addresses both surface mold and underlying moisture problems.

Air Quality Testing

Air quality testing is a crucial tool for determining the extent of an indoor mold problem. It involves capturing and analyzing spore counts, culture results, and colony-forming units. It also identifies the types of mold present, and can aid in assessing human exposure. It is typically a better option than bulk or surface sampling.

In order to perform a thorough test, experts isolate the area and use barriers like plastic sheeting to prevent mold spores from spreading outside of the containment zone. This is especially important when working in areas with large amounts of contamination or those with a significant water issue. In addition, filtration devices are often used to control the movement of airborne spores during the remediation process.

A thorough assessment will help determine the severity of the mold infestation, including its spread and impact on the property’s materials and structural integrity. It will also include identifying any potential health risks and addressing the source of moisture that contributed to the growth of the mold.

When evaluating an air quality problem, it is important to note that mold spore concentrations can vary based on the life cycle of the mold, atmospheric and environmental conditions, and the amount of ventilation. This is why it is essential to conduct a comprehensive assessment using multiple testing methods, including specialized air samples.

Air tests can identify only a portion of the molds present in a sample because they only measure living organisms, not dead ones. In addition, they don’t tell the whole story of exposures to molds since a variety of other substances commonly found in damp or water-damaged environments can cause or contribute to complaints in occupants.

Air sampling provides a more accurate picture of mold contaminant levels in an indoor environment than relying on spore counts or colony-forming unit analysis alone. However, it’s important to note that a positive result for mold doesn’t necessarily mean that the underlying health concerns will be resolved. To do so, the underlying condition must be addressed and the building must be dried completely. Depending on the severity of the problem, this may require substantial repairs or even complete demolition.

How Kitchen Remodeling Can Add Value to Your Home

The kitchen is one of the most used rooms in your home. Kitchen Remodeling San Jose is a great way to upgrade the space while adding value to your property.

Kitchen Remodeling

A well-designed kitchen is a key selling point for potential homebuyers. A professional can help you design a kitchen that suits your lifestyle while optimizing functionality and energy efficiency.

The aesthetic of your kitchen is key to making the space a happy go-to place for family and friends. You want the room to feel welcoming and appealing to everyone who enters, which means pleasant finishes and colors that reflect your unique style. A kitchen remodel is the perfect opportunity to try out design trends, explore cabinetry and countertop materials, and choose the best lighting to create a stunning and memorable kitchen.

While finding a design style and determining a layout are important, you must also consider your family’s lifestyle and daily habits when choosing materials and finishes for your new kitchen. For example, if you have young children who often help out in the kitchen, durable materials that can withstand wear and tear are a must-have. In addition, if you entertain guests frequently, statement lighting fixtures that add ambiance and personality can elevate your design.

Functionality in a kitchen is closely linked to efficiency, which can have a significant impact on how much time you spend preparing meals and enjoying them with your loved ones. Kitchen remodeling is the ideal opportunity to optimize your kitchen for workflow and flow by reconfiguring the placement of appliances, workstations, and storage areas. A well-designed layout can streamline tasks, minimize potential hazards, and make it easier to reach commonly used items.

Kitchen remodels should always be planned for the long-term, so that they will remain aesthetically pleasing and meet your family’s needs over the years to come. If you are planning on selling your home in the future, a modernized kitchen can make it more attractive to prospective buyers and increase your property value. Upgrades like a new backsplash, updated appliances, and sleek LED strip lighting can instantly elevate your kitchen’s look. These upgrades are often more affordable than major structural changes and can be completed in less time as well.

Functionality

The kitchen is a complex space in which every design element influences each other. For example, the placement of appliances affects the storage needs of adjacent cabinetry and the flow of traffic in the room. Kitchen remodelers consider all of these factors to create a more efficient, user-friendly layout that maximizes functionality and streamlines cooking activities.

When designing a kitchen, the first step is to identify your goals and priorities. Then, you can begin to define the aesthetics that speak to you and capture your personal style. This is a crucial step because your personal style and preferences will influence the end result of the remodel. Your design team will use this information to develop several concept designs that showcase different layout and aesthetic options for your kitchen. This is an opportunity to offer feedback and refine the concepts until you are happy with the results.

Kitchen remodeling is a great way to improve the function of your home, and it can also increase its value. The kitchen is one of the most important rooms in the house, and prospective buyers often prioritize modernized kitchens when looking at homes for sale. Additionally, kitchen upgrades are one of the quickest and easiest ways to add value to your home.

It’s also worth noting that there is a difference between kitchen remodeling and renovation. While both services can make your kitchen more attractive, remodeling is a more extensive service that involves significant changes to the structure and layout of the space. Kitchen renovation, on the other hand, focuses more on upgrading existing elements and making minor adjustments to the décor.

Both types of services have their benefits, but it’s important to understand the differences between them before deciding which option is right for you. If you’re unsure which option is best, you can always consult with an experienced kitchen remodeling professional to get some guidance.

Remodeling is a big project that can be overwhelming for homeowners. They have to think about the overall design and layout of their kitchen, make decisions on materials and fixtures, live through weeks of construction, and more. However, hiring a kitchen remodeling expert can make the entire process much less stressful and ensure that your new kitchen will meet all of your functional and aesthetic needs.

Energy Efficiency

The kitchen is one of the most energy-consuming areas in your home, with electricity for cooking and refrigeration and water used for washing dishes and cleaning. By focusing on energy-efficient improvements during your renovation, you can reduce your environmental impact and save on utility bills.

When planning your green remodel, start by identifying any problem areas that could lead to excess energy usage. Common culprits include inefficient lighting (such as traditional incandescent bulbs), poor insulation, leaking windows and doors, and excessive water consumption.

Upgrading to high-efficiency appliances, fixtures, and lighting can help reduce your energy usage in the kitchen while also lowering your utility bills. Energy-efficient appliances are designed to use less energy than their conventional counterparts without sacrificing performance, and you can further maximize your savings by installing smart thermostats or smart plugs to regulate your appliance usage and lower your energy rates during off-peak hours.

Choosing eco-friendly and sustainable materials for your countertops, cabinets, flooring, and other kitchen elements will not only save you money on energy bills but also reduce your carbon footprint. For example, reclaimed wood offers a distinctive aesthetic while helping preserve natural resources. Bamboo and recycled glass are both durable options that contribute to a healthy indoor environment with low VOC emissions.

Harnessing natural light is another simple way to cut your energy usage while enhancing the beauty of your kitchen. By installing skylights or larger windows, you can significantly reduce your reliance on artificial lighting during the day while creating a bright and welcoming atmosphere.

While you’re undergoing your kitchen remodeling project, consider upgrading your windows and doors to prevent air leaks, which can significantly increase your energy usage. By replacing your old single-pane windows with energy-efficient double-pane units, you can significantly decrease your heating and cooling costs while increasing your comfort levels. Also, be sure to seal any cracks or gaps in your walls and floors to keep conditioned air from escaping and unnecessarily burdening your heating and cooling systems. Finally, you can reduce your water consumption by installing low-flow faucets and fixtures that help to conserve water while still offering optimal functionality.

Value

Depending on what you do, your kitchen remodel can add value to your home. This is especially true if you make alterations that are easier for people with disabilities to use. For example, if you install an accessible sink or add grab bars, it can make your kitchen more appealing to people with limited mobility. This may help your home sell better, and it can also make it easier for you to live in your home for the rest of your life.

What Is the Best Kitchen Remodel for Your Home?

The answer to this question depends on what you’re willing to spend and the types of features that appeal to buyers. Generally speaking, you’ll get the most return on investment by choosing low-maintenance materials like quartz countertops or vinyl or tile flooring. Also, avoid over-personalizing your remodel with features that only you will enjoy (like art-deco drawer pulls). Instead, choose options that will be attractive to a wide range of buyers.

Another way to add value is by remodeling your kitchen to include new appliances or a major upgrade to the electrical system. These upgrades can significantly increase the home’s resale value and make it more competitive in the marketplace.

It’s important to note that remodeling and renovation are two distinct processes with different objectives. Remodeling entails changing the structure and layout of a room, while renovation focuses more on refreshing surfaces and replacing or updating fixtures. If you’re planning a full kitchen remodel, it’s important to understand the differences between these processes in order to maximize your return on investment.

Kitchens are one of the most common projects for homeowners to undertake, and they can be a great way to increase your home’s resale value. According to the Remodeling Magazine’s Cost vs Value Report, a mid-range kitchen remodel can return between 61% and 89% of its cost. However, it’s important to keep in mind that the ROI on a kitchen remodel can vary greatly depending on your location, house value, and quality of work.

If you’re interested in updating your kitchen to improve its aesthetics, functionality, or energy efficiency, contact us today for a free estimate! Our team of experienced contractors can help you create a kitchen that’s both beautiful and functional.

Epson Uv Printer – SureColor V1070

Suitable for printing on both flat and tapered items, this UV printer is well-suited to businesses that require high-resolution prints. It is equipped with the latest MEMS technology Epson printheads, ensuring excellent image quality and performance. Click the Epson Uv Printer to learn more.

The SureColor V7000 4’x8’ UV flatbed printer offers a new level of image quality, productivity and convenience for print service providers. Powered by vibrant 10-color UltraChrome UV inks, including opaque White and eye-catching Varnish, it produces vivid colors and striking textured prints.

Bring your uniqueness into the spotlight with the SureColor V1070, the UV printer that delivers true value without compromising on quality. This compact, versatile 4′ x 8′ flatbed is designed to print directly on wood and acrylic, along with a wide range of promotional items such as keychains, golf balls, pens and signage. Powered by 6-color UltraChrome UV ink, including opaque white ink and eye-catching gloss or matte varnish inks, it produces stunningly bright, colorful and tactile prints with low graininess and smooth gradations.

The V-Series features advanced RIP software, Epson Edge Print RIP, and connects to cloud based service PORT for status reports, remote printer diagnostics and monitoring. The printer is also equipped with an air filtration system with an odour reduction function to help create a clean and safe working environment.

This highly productive flatbed printer enables production of high-quality, outstanding-quality outdoor signage and promotional goods with a dazzling color gamut and exceptionally detailed images. Vibrant 10-color UltraChrome UV ink, including dedicated red and gray inks for signage, white ink that’s impressive on transparent and dark media, and varnish ink to add visual and tactile impact, deliver outstanding print performance.

A user friendly interface provides a simple, straightforward and fast experience. The convenient front operation design streamlines maintenance and allows wire-free placement for better utilization of space on a desk or workbench. A proximity sensor prevents end users from touching the printer to protect them from harm, while an ionizer reduces static electricity to ensure consistent and accurate printing on a variety of substrates.

For peace of mind, the V-Series comes with a 90-day limited warranty and 1-year Extended Service Plan (Next Business Day On-site Repair) available for purchase. Preferred Plus Extended Service Plans are available to further extend coverage up to 5 years2.

The V-Series is supported by an extensive network of certified Solution Centers located throughout North America. Visit a center near you to see in-person how these exceptional printers can push the limits of your creativity with unprecedented print speed, precision and reliability. Designed and manufactured by Epson, the worldwide leader in large-format printing technology, the SureColor V-Series is built with quality components to provide industry leading performance.

Media Support

With a large print area, this flatbed printer is capable of printing various types of media. It supports media up to 80mm thick, making it suitable for a wide range of applications. It also comes with a variety of accessories, including an integrated ionizer to reduce static electricity and prevent dust from adhering to the media.

The SC-V7000 is an ideal large format UV flatbed printer for businesses looking to expand into a wider variety of media. The device produces accurate, colour consistent prints with stimulating reds that help to create high-value signage and striking POS displays. The device is easy to use and maintain, making it a great choice for both small and medium businesses.

With its ten-color UltraChrome ink set, the SC-V7000 can be used to produce head-turning promotional goods and outdoor signage. The SC-V7000 can also be used to print onto rigid substrates. This is a major benefit, as it allows businesses to print onto materials that would otherwise be difficult to achieve with a traditional flatbed printer. The ink set also includes a varnish ink and white ink that helps to limit graininess and ensure vivid colours.

Signage businesses are often looking for versatility and a low total cost of ownership, both of which are addressed by the SC-V7000. The device can print directly onto a variety of materials, including metal and stone, as well as foam board and poster board. It can even print onto substrates up to 3.14 inches (80 millimeters) thick, thanks to a unique feature that automatically adjusts and secures the media in place.

The device can be used to print using an EMX preset from the media manufacturer, or can be configured to support custom media by creating a Custom Media in Epson Media Installer and selecting it in the printer driver. This will load the mechanical settings and color profile into the printer, ensuring that the best quality is achieved. This can be especially beneficial for businesses that wish to use third-party RIP software, as it will ensure the correct settings are applied.

Printing Options

With its ten color ink set that includes red and white, the V7000 is capable of printing on a wide range of substrates. It can print up to 43m2/hr, which is a decent speed for a wide-format UV flatbed printer. The printer is able to handle substrates up to 80mm thick, which allows it to print on an array of materials, including metal, wood, acrylic and more.

The V7000 is equipped with the latest MEMS technology Epson printheads, which ensure accurate prints and a high level of precision. It uses continuous ink circulation to minimize the need for frequent addition of ink, and features a smart nozzle drop calibration system that minimises static charge. It is also equipped with a crash sensor to prevent damage to the print heads when printing on particularly difficult substrates.

This machine is ideal for sign businesses, as it is able to print directly onto a variety of surfaces. This can help reduce costs and speed up workflow, as well as improve the quality of the final product. The printer can also be used to print on a variety of different products, including smartphone cases, bags, puzzle pieces and other flat objects. It is also suitable for printing on tapered or cylinder items, such as power banks and small speakers.

Epson’s market-leading print image quality is also evident in the V7000, with a vibrant ten-color UltraChrome UV Ink set that includes opaque White Ink and eye-catching Gloss or Matte Varnish Ink. This allows for an expanded colour gamut and reduced graininess. The V7000 also offers a range of finishing options, which allow you to add texture, glisten and shine to your printed products.

A simple-to-use software package from Epson makes it easy to manage the V7000, and allows for streamlined production processes. This includes automated ink management, job scheduling, layer optimisation and a range of other functions. It is also backed up by the cloud-based PORT solution, which provides intuitive real-time remote monitoring of the printer’s status and production efficiency tracking and reporting.

Warranty

During the standard limited warranty period, your printer is backed by Epson’s premium level of service and support. After the limited warranty expires, you can extend your coverage with one of Epson’s Preferred Plus Extended Service Plans. Whether you choose our Next-Business-Day On-Site1 Repair plan or another, you can count on the fastest service in the industry, including comprehensive parts and labor coverage, plus printheads1.

Preferred Plus Service and Support Plans provide telephone technical support during the term of the Plan, and Product exchange service for up to two additional years after the Plan has expired (as described in the Product Limited Warranty statement included with the Product at the time of purchase). Plans must be purchased prior to expiration of the standard limited warranty period.

For warranty-related claims, Customer must contact the toll free number identified in the EPSON Preferred Plus Service and Support Plan booklet provided with your Product at the time of original purchase or provided by an Epson representative, enter the Unit ID number and describe the problem. Epson will determine whether your Product requires service and may send a replacement product, an advance loaner or, at Epson’s option, refund the purchase price for the Product.

This agreement is the complete and exclusive agreement between the parties. No Epson employee or other person is authorized to make any representation or statements that are inconsistent with this Agreement. Except as stated herein, Epson makes no other warranties of any kind with respect to the Product. Epson further disclaims any implied warranties of merchantability and fitness for a particular purpose.

This plan provides next-business-day on-site repair service by an Epson Certified Technician, using genuine Epson parts. You can also get unlimited head replacements for up to five years (as specified in your Plan). The printhead is a maintenance item which you are responsible for replacing on a regular basis, but Epson covers the cost of the actual replacement under this Plan. Please see the terms and conditions of your specific plan for more details.

Crafting Memories: The Art of Choosing the Perfect Wedding Venue

A wedding is a significant milestone in the lives of many couples, and choosing the perfect venue is one of the most important decisions in the planning process. The venue sets the tone for the entire celebration, shaping the atmosphere and creating a backdrop for cherished memories. With countless options available, couples often embark on a journey of exploration and decision-making to find a location that resonates with their vision, style, and preferences.

Wedding Venue

For some, the allure of outdoor venues is irresistible. These settings offer a connection to nature, whether it be a serene garden, a lush forest, or a breathtaking view of the horizon. The beauty of the natural environment can serve as a canvas for creativity, with minimal décor required to enhance its charm. Couples who dream of an open-air celebration often appreciate the flexibility these venues provide, allowing for unique layouts and personalized touches. However, outdoor settings also come with the unpredictability of weather, prompting many to have contingency plans to ensure their day remains flawless.

Indoor venues, on the other hand, provide a controlled environment that eliminates weather-related concerns. From grand ballrooms to cozy banquet halls, these locations offer a variety of options to suit different tastes and budgets. The appeal of indoor spaces often lies in their ability to be transformed into any theme or style. Whether a couple envisions a glamorous, elegant affair or a minimalist, modern celebration, an indoor venue can be tailored to bring their vision to life. Additionally, the comfort of climate control and reliable amenities makes these spaces a practical choice for many.

For those seeking a sense of history or character, historic venues or unique architectural sites often hold a special allure. These locations exude charm and personality, offering a sense of timelessness that aligns beautifully with the sentiment of a wedding. Vaulted ceilings, intricate details, and storied walls create a setting that feels both romantic and distinctive. Such venues often require little additional decoration, as their inherent beauty provides a captivating backdrop for the ceremony and reception.

Destination weddings have become increasingly popular, with couples choosing to exchange vows in locations that hold personal significance or promise an unforgettable experience for their guests. These venues can range from idyllic coastal settings to remote retreats tucked away in nature. The appeal of destination weddings often lies in their ability to combine the celebration with a memorable getaway. For couples and their loved ones, the journey to the venue becomes part of the shared experience, creating lasting memories beyond the wedding day itself.

Budget considerations play a pivotal role in venue selection, as the location often represents a significant portion of the overall wedding expenses. While some venues come with all-inclusive packages that simplify planning, others may require couples to coordinate various elements themselves, such as catering, décor, and entertainment. Understanding the financial implications of each option helps couples make informed decisions while staying true to their vision. Creativity can go a long way in making even the simplest venue feel extraordinary, ensuring that the celebration is as meaningful as it is beautiful.

For those who value intimacy and a deeply personal touch, private properties or homes are an appealing choice. These venues offer a sense of familiarity and warmth, creating a setting that feels uniquely theirs. Hosting a wedding in a family home or a cherished location adds sentimental value to the celebration, making it deeply meaningful for everyone involved. While these venues require additional planning to accommodate logistics, the personal connection they offer often outweighs the challenges.

Seasonality is another factor that influences venue selection, as different times of the year bring varying considerations. Spring and summer weddings are often associated with vibrant outdoor settings, while autumn and winter celebrations lend themselves to cozy, indoor venues. Understanding the seasonal dynamics of a venue, such as its natural lighting or availability of seasonal décor, allows couples to enhance their chosen location and create an ambiance that aligns with the time of year.

Accessibility is an important consideration, particularly for couples with guests traveling from different areas. Venues that are easily reachable or located near accommodations can reduce logistical challenges and make the experience more enjoyable for everyone. Couples often take into account the needs of elderly or differently-abled guests, ensuring that the location provides the necessary amenities and conveniences. A well-thought-out choice reflects care and thoughtfulness, contributing to a memorable experience for all.

The process of selecting a venue often begins with envisioning the overall style and scale of the wedding. Some couples dream of grand celebrations with hundreds of guests, while others prefer intimate gatherings with close family and friends. The size of the guest list significantly influences the choice of venue, as the space must comfortably accommodate everyone while still maintaining the desired atmosphere. Venues with versatile layouts allow couples to adjust the arrangement to suit their vision, whether it involves long banquet tables, a spacious dance floor, or cozy lounge areas.

Themes and personal aesthetics also guide venue selection, as couples often seek locations that align with their chosen style. Whether inspired by rustic charm, modern elegance, or vintage romance, the venue becomes an extension of the couple’s personality. It provides a backdrop that enhances the overall theme, allowing every detail, from floral arrangements to table settings, to harmonize seamlessly with the surroundings.

The availability of amenities is a practical consideration that can simplify the planning process. Venues offering in-house services such as catering, photography, or décor reduce the need to coordinate with multiple vendors. For couples who prefer a hands-on approach, venues with fewer restrictions provide the freedom to bring in preferred vendors or add personal DIY touches. Balancing convenience with creativity allows couples to curate a celebration that feels authentically theirs.

Some couples find joy in exploring unconventional venues that defy traditional expectations. These locations may include art galleries, industrial warehouses, or even open fields. The charm of such venues often lies in their uniqueness, offering a blank canvas for couples to bring their vision to life. While these spaces may require more effort in terms of preparation and customization, the result is often a one-of-a-kind celebration that leaves a lasting impression.

Ultimately, the perfect wedding venue is one that resonates with the couple’s love story and creates a setting where cherished memories can be made. The search for this ideal location is as much about practical considerations as it is about emotion and intuition. It involves a balance of logistical planning, budget management, and creative vision, culminating in a choice that feels deeply personal.

Every venue has its own story to tell, and every couple adds a new chapter to that narrative. Whether it’s a sunlit outdoor ceremony, a candlelit indoor celebration, or a joyous gathering in a unique space, the venue becomes a witness to the vows exchanged and the love celebrated. It frames the laughter, tears, and heartfelt moments that define a wedding day, leaving an indelible mark on the memories of all who attend.

Door Replacement – An Opportunity to Improve Your Home’s Energy Efficiency, Security, and Aesthetics

Door Replacement Austin offers an opportunity to improve your home’s energy efficiency, security, and aesthetics. It’s important to hire experienced and knowledgeable tradespeople who have experience with door installation and can provide quality results.

Door Replacement

Doors that stick, squeak or require force to open and close indicate alignment issues or frame damage. They also allow air to escape, raising your energy costs.

A door replacement project offers a wide range of customization options. This allows you to tailor your doors to fit your home’s aesthetic and meet your energy efficiency and security needs. The type of material, style, finish, and hardware you choose will determine how much the project will cost. Door add-ons like security features and decorative glass can also affect price.

Whether your doors are the entry point to your home or a part of your home’s facade, they play important roles in protecting your family and belongings, preventing intruders from entering, and adding curb appeal. If your doors are beginning to show signs of wear, are difficult to open and close, or have visible damage or stains, it may be time to consider replacing them.

When it comes to door replacement, there are several things you should consider before deciding on a contractor. Look for a company with a strong reputation in the community, positive customer reviews, and an extensive portfolio of previous projects. You should also consider the amount of work needed to complete your door replacement project, as this will impact the total cost and timeline of the project.

During your consultation, the contractor should assess the condition of your existing doors and the installation site. They should take measurements of the opening and the existing frame to ensure a perfect fit. They should also discuss the different types of door replacement and the installation process. If you’re installing a pre-hung door, the installer will remove the slab (door) from its frame and slide it into a portion of your existing wall. This makes the installation faster and less invasive than a full door replacement.

Energy Efficiency

Besides being stylish and providing greater privacy, new doors are designed with energy efficiency in mind. This means they are better insulated, helping to maintain a consistent indoor temperature and reduce drafts and energy costs. Energy-efficient replacement doors also help to reduce your carbon footprint and conserve natural resources.

The material used to construct your doors impacts their energy efficiency. Fiberglass and steel offer superior insulation properties, compared to solid wood doors. Other factors that contribute to a door’s energy efficiency are the window frames, weatherstripping, and glass-to-door ratio. Additionally, a door’s frame and insulation can be improved with the addition of energy-efficient add-ons.

If you notice that your doors are difficult to open and close, or are sticking or sagging, it’s likely time for a replacement. This can be a sign of serious damage or wear that will only worsen with continued use. A professional inspection can assess the damage and determine whether repair is an option or a replacement is required.

A door’s R-Value and U-Factor are the most important indicators of its energy efficiency. The higher the R-Value, the more effective it is at insulating a home and preventing heat loss. The lower the U-Factor, the less heat escapes and the more efficient it is.

Other features that enhance a door’s energy efficiency include low-emissivity coatings, inert gas fills between glass panes, and more. The best doors will have a U-factor of 0.17 and a SHGC of 0.23, or better.

If you want to learn more about how upgrading your doors can increase your energy efficiency, schedule a free home energy score consultation with Plastpro. A home energy score report will highlight the areas of your home that require improvement, including your exterior doors. This will give you a clear idea of the improvements that would make the biggest difference in your energy consumption and costs. In addition, you may qualify for government incentives and rebates if you choose energy-efficient replacement doors. Contact us today to schedule your appointment! We’ll help you create the perfect door to fit your home and aesthetic.

Security

In an era when home security is paramount, it’s important to consider the door as a potential entry point for intruders. A well-chosen replacement door can fortify the home and deter intrusions, and it’s essential to find a solution that balances aesthetic appeal with robust protection.

A seasoned contractor can help homeowners identify and implement the right upgrades to strengthen the security of their homes. This includes ensuring that the frame is strong and secure, as well as enhancing the lock with features that prevent picking and bumping.

During installation, the contractor should carefully remove the old door to avoid damaging the surrounding structure and ensure that the new door is properly aligned in the frame. The installer can also make fine adjustments to ensure that the door opens and closes smoothly, and that it seals tightly to prevent air infiltration.

The type of material the door is made from is another important factor in its security, as some materials are more sturdy and durable than others. In addition, some doors come with special reinforcements that improve their security, such as a reinforced strike plate that protects the area where the latch sits. Other options include hinge guards to reinforce the hinge points, which are often a weak point in break-in attempts, and security bars that add an extra layer of protection.

It’s also a good idea to install a peephole, which allows homeowners to see visitors before opening the door, or a security bar that makes it difficult to force open the door from the outside. Some doors also feature tempered glass, which shatters into small, less dangerous pieces, or impact-resistant glass that can withstand a heavy blow.

The best way to ensure that a new replacement door offers the highest level of security is to have it professionally installed. An experienced professional will ensure that the door fits securely in the frame and that all of its security features are functioning as intended.

Aesthetics

Door replacement is a versatile home improvement project that redefines a home’s aesthetic and contributes to its functionality and energy efficiency. It also provides homeowners with a variety of design and material options to fit their specific preferences.

Whether you want to create a bright, cheerful atmosphere or enhance the visual appeal of your home, selecting the right color for your door is essential. A door that matches the surrounding brick or exterior paint hues can significantly improve a home’s curb appeal. On the other hand, a neutral colored door can blend in with any existing décor and offer a sleek appearance.

A door’s primary function is to provide security, and it can help prevent drafts and energy loss by preventing air leakage. However, older doors often do not have the same security features as newer models, making them more vulnerable to forced entries and break-ins. Replacing your door with a more secure model will not only improve your home’s security, but it will also lower your energy costs.

Many older homes have dingy-looking doors that can make the entire property look unkempt and outdated. Replacing your doors with new, stylish ones will immediately give your house a fresher appearance.

Door replacements are also an ideal opportunity to revamp the entryway’s trim work. Using different materials, designs, and colors for the trim can significantly improve your home’s appearance.

The first sign that you should consider replacing your door is visible damage or wear and tear. For instance, if your door has become difficult to open or close, this is an indication that it’s time for a replacement.

Another reason to consider door replacement is that old doors may not be as insulated as newer models, leading to high heating and cooling costs. A new, insulated door will be better at retaining heat in the winter and keeping your home cool in the summer, reducing energy costs. Moreover, some energy-efficient doors qualify for tax credits, providing additional savings. Lastly, if your door is old and worn out, it will likely be more susceptible to dents and scratches, which can decrease its security features.

What to Consider and How to Best Execute a Stucco Repair

Stucco Repair is an essential residential service that can enhance the beauty and value of your home. Learn about what to consider and how to best execute this project.

The first step of this process is to inspect the stucco and identify any damage. Chisel any loose areas and wash the surface to ensure a clean base for the new material. Contact Stucco Repair Philadelphia now!

Stucco is a beautiful and durable material that improves the longevity of your home if it’s properly maintained. However, like any exterior material, stucco can experience damage over time from weather and other environmental factors. Identifying and addressing these signs of damage as soon as possible will prevent further complications, such as structural damage and health risks like mold.

The first step in any stucco repair project is to clean and prep the damaged area. Using a wire brush, remove any loose debris or dirt and wash the area thoroughly to ensure proper adhesion for your new stucco. If the area has sustained significant water damage, a thorough cleaning and drying process is required before proceeding.

Hairline cracks are the most common sign of stucco damage, and they can be easily repaired with joint compound. However, if the cracks extend deeper into the structure, re-stuccoing may be required.

Other damage indicators include abrasions and discoloration. These can be caused by a variety of issues, including the use of non-stucco products or simply wear and tear from the elements. If you notice any of these signs, it’s best to contact a professional.

For holes and cracks, the same repair technique applies. Thoroughly clean the area and apply a bonding agent to ensure proper adhesion of your new stucco. Then, fill the hole or crack with stucco mix and press firmly to ensure no air pockets are present. Finally, smooth and texture the surface to match the surrounding stucco.

Water damage is one of the biggest causes of stucco damage, and it can lead to a number of other issues, including mold and mildew. It’s important to address the cause of the moisture intrusion rather than just treating the symptoms.

Water-damaged stucco also tends to become brittle and prone to further damage. It’s therefore essential to install a proper waterproofing system in addition to any repairs or replacements to your stucco. For this, a high-quality caulking product will be needed to effectively seal and protect the stucco from the elements.

Sealing

Whether from wind or rain, the first step in addressing stucco damage is to examine both the surface and the depth of the problem. In addition to a visual inspection, moisture tests can also help, particularly with deeper damage. For example, if the stucco is moist to the touch and has visible mold or mildew, a moisture meter can confirm that the problem is not simply superficial but has penetrated the brown coat or even lath (the mesh framework onto which stucco is applied).

Repair or Remediation

Once the damaged area has been repaired, the next step is to seal it. A quality stucco sealant can greatly enhance the durability of your stucco, especially in wet climates. Choose a product that is designed for stucco and follow the manufacturer’s instructions for application.

When you’re finished, allow the sealant to dry completely (typically within a few days). Then, perform a walk-through to verify that the work meets your standards.

For Cracks and Small Holes

Once you’ve determined the extent of your stucco repairs, it’s time to apply the finish coat. During this process, it’s important to remember that patience is key. It may take a few weeks for the final coat to fully cure, so be sure to keep it protected from rain and direct sunlight until then.

During the patching and curing processes, it’s also important to keep in mind that the repair materials should match the texture of your stucco as closely as possible. If the new material is significantly different in color or texture, it will be apparent and will not look natural.

For cracks, begin by wire-brushing the affected areas and wetting them with bonding liquid. Then, use a cold chisel to undercut the bottom of each crack, widening them slightly and making it easier to “key in” the new stucco.

Then, cut a piece of fresh lath slightly larger than the hole and install it using galvanized nails or screws. Make sure to firmly attach it to the existing wall, securing it tightly in all corners and at the top and bottom of each wall. Then mix your stucco mud—following the package directions and aiming for a consistency similar to peanut butter—and spread a 1/4-inch layer over the lath.

Patching

Whether the repair is for small holes, cracks, or other damage to the exterior of your home or business, patching requires a careful approach. The wrong material can result in more costly damage to the structural integrity of your building. It is important to understand what you are getting into before attempting a DIY stucco project. Choosing the right patching material for your needs and understanding the process can help you save time and money while maintaining the beauty of your property.

The first step in the stucco repair process is to clean the area thoroughly to ensure a good bond with the new material. Use a wire brush to remove any loose particles, and then dampen the area slightly with water to help prevent further moisture intrusion. In the case of large holes, a piece of metal lath may need to be cut and secured to the structure to provide a strong base for the new stucco application.

After the damaged area has been cleaned and inspected for underlying issues, it is time to begin the patching process. First, select a stucco patching compound that is compatible with the existing surface. A standard cement-based patching compound works well with traditional stucco, while a specialized EIFS product may be needed to repair damaged areas of an EIFS system.

Mix the stucco patching compound according to the manufacturer’s instructions. This material dries quickly, so it is important to only mix enough for the amount of time that you need it. In the case of a larger hole, it is often necessary to apply the patching material in several layers. It is important to allow the patching material to dry completely between each layer.

Once the patching has been completed, it is important to protect the area from sun and wind until it has cured. This can be done by covering the patched area with a tarp or shade. It is also recommended to occasionally mist the patched area with water to slow drying and improve the strength of the final result.

Once the patched area has cured, it can be painted to match the surrounding texture. This step is essential to maintain the aesthetics of your exterior surfaces, as it helps the repaired areas blend seamlessly with the existing stucco.

Painting

The final step in a stucco repair is painting the damaged area to ensure that it blends seamlessly with its surroundings. In addition to improving the appearance, it will also protect the stucco from further damage by locking out moisture and other environmental contaminants.

Before proceeding with any paint application, it’s important to make sure that the repaired area has dried completely. To check this, place a clear piece of plastic wrap over the surface and press gently. If it fogs up, the stucco has not fully dried and may require further time to cure. It’s also a good idea to keep the repaired area protected from extreme weather conditions while it’s curing, as cold temperatures or direct sunlight can ruin newly applied stucco. In some climates, moist curing may be a useful technique, which involves periodically misting the stucco to prevent it from drying too quickly.

While it’s possible to perform small repairs yourself, more extensive damage may be best handled by a professional. A stucco remediation contractor will be able to assess the severity of your problem and recommend a suitable repair method.

Moisture Damage

Moisture damage to your stucco can be difficult to detect, but it’s essential to address it as soon as you notice any symptoms. These signs include musty odors, discoloration, and bubbling or blistering. If you see these warning signs, it’s likely that water is leaking behind the stucco and causing damage. If the moisture isn’t addressed, you could face costly structural damage to your home.

Mold Damage

Mold growth is another common cause of stucco damage, and it’s often a sign that there’s a leak in the waterproof layer. This is a big problem because it can damage the entire house structure and lead to serious health issues for you and your family. Mold often occurs as a result of water entering the stucco through cracks or holes.

The most effective way to treat mold and water damage in your stucco is by performing a full remediation. Remediation is more expensive than simple repairs, but it will address the underlying problems that are causing your stucco to deteriorate.